Irresistible Nanaimo Bars You Must Try Now
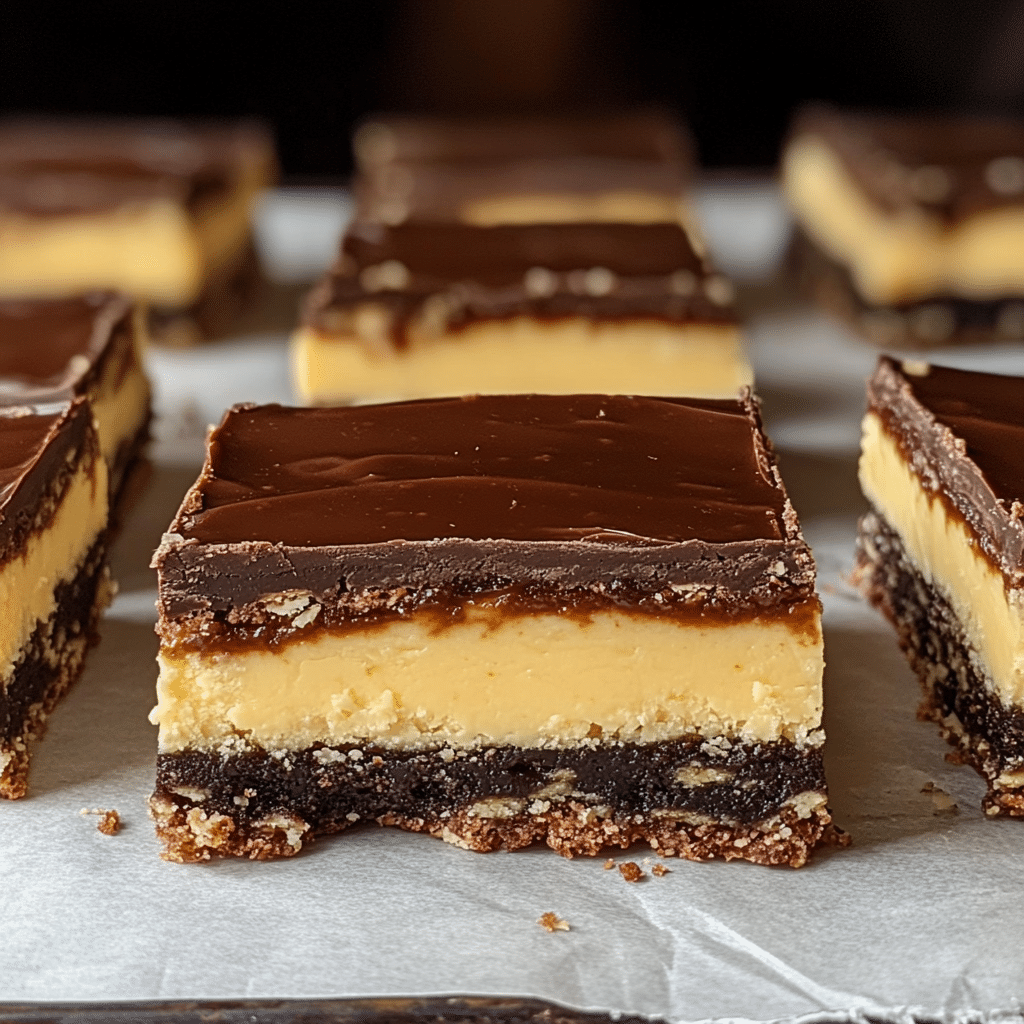
Discover the mouthwatering charm of Nanaimo Bars with this easy, no-bake recipe that’s perfect for every sweet craving! These layered Canadian treats bring together a crunchy base, a creamy custard middle, and a rich chocolate top, creating a dessert experience that’s both nostalgic and irresistible. Whether you’re new to Nanaimo Bars or a longtime fan, this guide will walk you through everything you need to know to create the perfect batch right at home.
Why You’ll Love This Recipe
- Quick and No-Bake: Enjoy a delicious dessert without turning on your oven, saving time and energy.
- Layered Texture: The combination of crumbly, creamy, and smooth layers offers a delightful contrast in every bite.
- Customizable Flavors: You can easily tweak the recipe with different chocolate types or add-ins to suit your taste buds.
- Crowd-Pleaser: Perfect for family gatherings, parties, or holiday treats, Nanaimo Bars appeal to all ages.
- Classic Canadian Treat: They offer a sweet taste of Canadian heritage that’s beloved across the country and beyond.
Ingredients You’ll Need
This recipe uses simple, essential ingredients that come together beautifully to create the perfect Nanaimo Bars. Each ingredient plays a vital role in balancing flavor, texture, and richness.
- Graham Cracker Crumbs: Provides a crunchy and slightly sweet base layer that’s perfectly sturdy.
- Unsweetened Cocoa Powder: Adds a deep chocolate flavor with just the right hint of bitterness in the bottom crust.
- Butter: Essential for richness and binding all the layers together, enhancing mouthfeel.
- Sugar: Sweetens the base and the custard layer, balancing bitterness and creaminess.
- Vanilla Custard Powder: Creates that iconic creamy custard filling with smooth texture and vanilla aroma.
- Eggs: Used in the custard layer to provide structure and creaminess.
- Semi-Sweet Chocolate: Melts smoothly on top for a glossy, rich chocolate layer that hardens perfectly.
- Heavy Cream or Coconut Milk: Adds silkiness to the chocolate topping, making it easier to spread and more decadent.
- Chopped Nuts (optional): Adds a delightful crunch and extra flavor to the base if desired.
Variations for Nanaimo Bars
Feel free to get creative with this classic Nanaimo Bars recipe! It’s incredibly flexible, so adapting it is both fun and simple depending on your dietary needs or flavor cravings.
- Nut-Free Version: Simply omit the nuts from the base or replace with seeds like sunflower to keep crunch without allergens.
- Vegan Adaptation: Use plant-based butter, coconut milk, and egg substitutes like flax eggs to enjoy a cruelty-free treat.
- Flavor Infusions: Add a splash of peppermint extract or espresso powder for a refreshing twist.
- White Chocolate Topping: Swap the semi-sweet chocolate for white chocolate for a sweeter, creamier top.
- Fruit Layer: Incorporate a thin jam or fresh fruit layer between custard and chocolate for extra zing.

How to Make Nanaimo Bars
Step 1: Prepare the Base
In a bowl, combine graham cracker crumbs, cocoa powder, sugar, and chopped nuts if using. Melt the butter and mix it into the dry ingredients until fully combined. Press this mixture evenly into a lined baking pan to form the firm, crunchy bottom layer.
Step 2: Make the Custard Layer
In a separate bowl, beat the softened butter and sugar until creamy. Gradually add the vanilla custard powder and eggs, mixing until smooth and fluffy. Spread this pale yellow custard mixture evenly over the base and refrigerate to set for at least 30 minutes.
Step 3: Prepare the Chocolate Topping
Gently melt the semi-sweet chocolate with heavy cream or coconut milk over low heat or using a double boiler. Stir until glossy and smooth. Pour the chocolate layer over the set custard and spread evenly with a spatula.
Step 4: Chill and Set
Refrigerate the assembled Nanaimo Bars for 2 to 3 hours or until the chocolate topping is firm. Once set, slice into squares and enjoy the layered goodness.
Pro Tips for Making Nanaimo Bars
- Use Room Temperature Butter: It blends more easily with sugar in the custard layer, creating a smoother texture.
- Chill Properly: Allow ample chilling time for clean, firm layers that make slicing and serving easier.
- Even Spreading: Use an offset spatula to get smooth, level layers and a professional finish.
- Quality Chocolate: Opt for good quality chocolate for the topping to maximize flavor and texture.
- Prevent Cracking: When slicing, dip your knife in hot water and wipe dry for neat edges.
How to Serve Nanaimo Bars
Garnishes
Sprinkle with finely chopped nuts, edible gold flakes, or dust a light layer of cocoa powder on top to elevate presentation and add texture contrast.
Side Dishes
Pair Nanaimo Bars with a cup of rich coffee, a scoop of vanilla ice cream, or a serving of fresh berries to balance sweetness and refresh your palate.
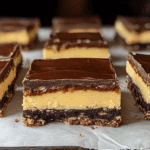
Creative Ways to Present
Serve Nanaimo Bars stacked on a decorative plate, or cut them into bite-sized squares for parties. They also look stunning with a drizzle of caramel or raspberry sauce for an extra touch of elegance.
Make Ahead and Storage
Storing Leftovers
Keep Nanaimo Bars in an airtight container in the refrigerator for up to five days to maintain freshness and prevent the chocolate from melting.
Freezing
Wrap individual squares tightly in plastic wrap and store them in a freezer-safe container; Nanaimo Bars freeze well for up to two months without losing texture or flavor.
Reheating
Allow frozen Nanaimo Bars to thaw in the refrigerator overnight before serving; avoid microwaving to keep the chocolate topping intact and prevent melting.
FAQs
What are Nanaimo Bars?
Nanaimo Bars are a three-layered Canadian dessert featuring a crumbly cocoa base, a creamy vanilla custard middle, and a smooth chocolate topping.
Do Nanaimo Bars require baking?
No, Nanaimo Bars are a no-bake recipe, making them quick and easy to prepare at home without an oven.
Can I make Nanaimo Bars gluten-free?
Yes, by substituting graham cracker crumbs with gluten-free alternatives like gluten-free cookies or nut flours, you can make a gluten-free version.
How long do Nanaimo Bars last?
When stored properly in the refrigerator, Nanaimo Bars typically stay fresh for up to five days.
Can I freeze Nanaimo Bars?
Absolutely! Nanaimo Bars freeze well and can be enjoyed later by thawing them in the refrigerator overnight.
Final Thoughts
Nanaimo Bars truly are a delightful treat that bring joy with every bite. This simple no-bake recipe captures their classic charm and makes baking them at home a breeze. Once you try making your own, you’ll find they’re perfect for sharing, gifting, or just satisfying your own sweet cravings. Dive in and treat yourself to these irresistible layered bars—you won’t regret it!
Related Posts
- Easy 3-Ingredient Peanut Butter Cookies Recipe
- Why Philly Fluff Cake Is Your New Favorite Dessert
- Irresistible Tahini Thumbprints Cookies With Dulce de Leche
Nanaimo Bars
- Total Time: 3 hours 15 minutes
- Yield: 16 squares 1x
- Diet: Gluten Free (with substitutions)
Description
Discover the delightful taste of classic Canadian Nanaimo Bars, a no-bake layered dessert featuring a crunchy cocoa base, creamy vanilla custard filling, and a smooth chocolate topping. Perfect for any occasion, these bars combine rich textures and flavors in every bite and are simple to prepare at home.
Ingredients
Base Layer
- 1 cup graham cracker crumbs
- 2 tbsp unsweetened cocoa powder
- 1/4 cup sugar
- 1/2 cup unsalted butter, melted
- 1/4 cup chopped nuts (optional)
Custard Layer
- 1/2 cup unsalted butter, softened
- 2 tbsp sugar
- 2 tbsp vanilla custard powder
- 2 large eggs
Chocolate Topping
- 4 oz semi-sweet chocolate
- 3 tbsp heavy cream or coconut milk
Instructions
- Prepare the Base: In a bowl, combine graham cracker crumbs, cocoa powder, sugar, and chopped nuts if using. Melt the butter and mix it thoroughly into the dry ingredients until fully combined. Press this mixture evenly into a lined baking pan to form a firm, crunchy bottom layer.
- Make the Custard Layer: In a separate bowl, beat the softened butter and sugar until creamy. Gradually add the vanilla custard powder and eggs, mixing until smooth and fluffy. Spread this pale yellow custard mixture evenly over the base and refrigerate to set for at least 30 minutes.
- Prepare the Chocolate Topping: Gently melt the semi-sweet chocolate with the heavy cream or coconut milk over low heat or using a double boiler. Stir until glossy and smooth. Pour the chocolate layer over the set custard and spread evenly with a spatula.
- Chill and Set: Refrigerate the assembled Nanaimo Bars for 2 to 3 hours or until the chocolate topping is firm. Once set, slice into squares and enjoy the layered goodness.
Notes
- Use Room Temperature Butter: It blends more easily with sugar in the custard layer, creating a smoother texture.
- Chill Properly: Allow ample chilling time for clean, firm layers that make slicing and serving easier.
- Even Spreading: Use an offset spatula to get smooth, level layers and a professional finish.
- Quality Chocolate: Opt for good quality chocolate for the topping to maximize flavor and texture.
- Prevent Cracking: When slicing, dip your knife in hot water and wipe dry for neat edges.
- Prep Time: 15 minutes
- Cook Time: 0 minutes
- Category: Dessert
- Method: No-Bake
- Cuisine: Canadian
Nutrition
- Serving Size: 1 square (approx. 1.5 x 1.5 inch)
- Calories: 250 kcal
- Sugar: 18 g
- Sodium: 60 mg
- Fat: 16 g
- Saturated Fat: 9 g
- Unsaturated Fat: 5 g
- Trans Fat: 0 g
- Carbohydrates: 24 g
- Fiber: 1 g
- Protein: 3 g
- Cholesterol: 45 mg
Keywords: Nanaimo Bars, no-bake dessert, Canadian dessert, layered bars, custard bars, chocolate topping, gluten-free dessert option