How to Make Old-Fashioned Raspberry Jam Today

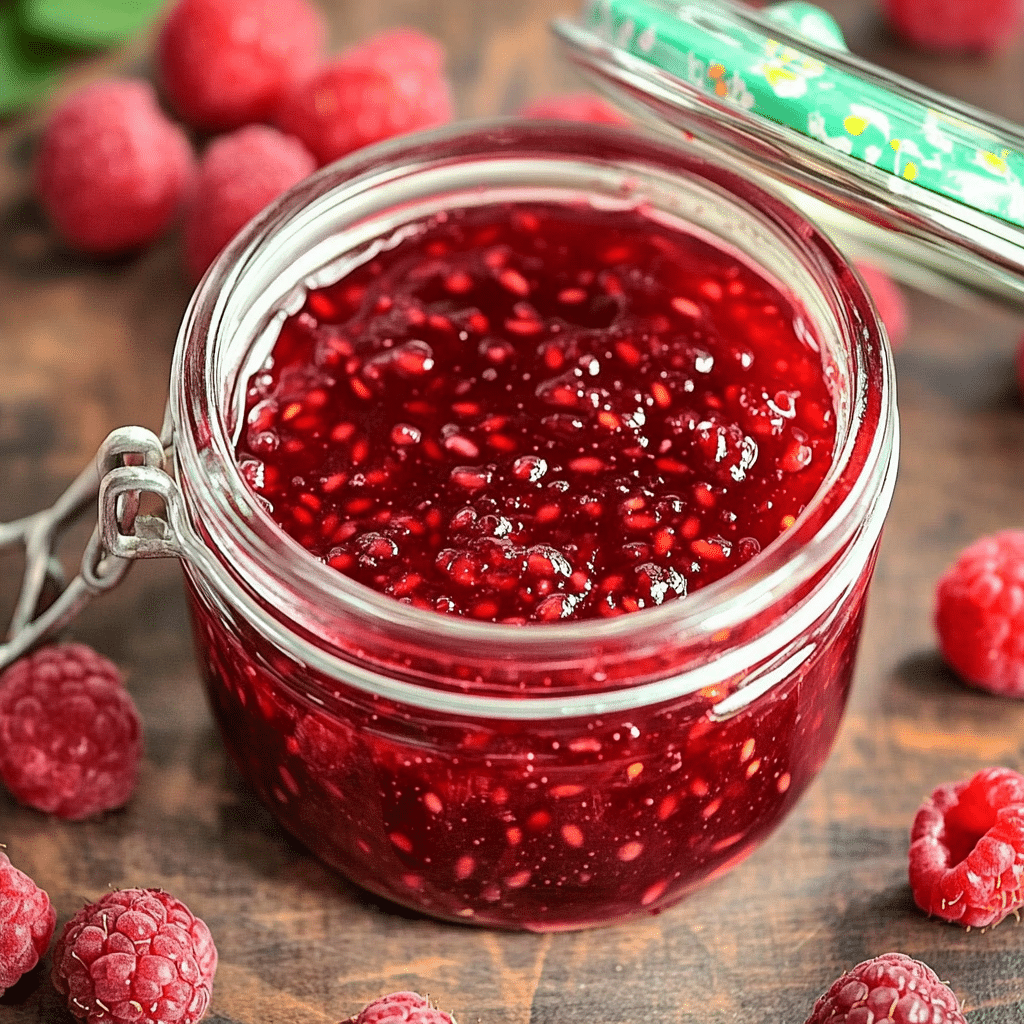
If you’ve ever wished to capture the bright, tangy sweetness of summer in a jar, then this Old-Fashioned Raspberry Jam recipe is exactly what you need. It’s a simple yet classic method to create homemade jam that bursts with fresh raspberry flavor and a delightful balance of sweetness and tartness. Whether you spread it on toast, swirl it into yogurt, or gift it to friends, this recipe brings the nostalgic charm of traditional jam-making right into your kitchen today.
Why You’ll Love This Recipe
- Authentic Flavor: Enjoy the true essence of ripe raspberries cooked gently to preserve their natural brightness.
- Simple Ingredients: Uses just a few pantry staples, making it accessible and budget-friendly.
- Rich Texture: The jam has the perfect spreadable consistency with slight berry chunks for a homemade feel.
- Long Shelf Life: Properly canned, this jam can last for months, giving you a taste of summer all year round.
- Versatile Usage: Great on bread, desserts, or as a gift, making it a favorite in any kitchen.
Ingredients You’ll Need
This Old-Fashioned Raspberry Jam recipe is all about simple ingredients that shine individually and blend beautifully together. Each element plays a vital role in flavor, texture, and preservation.
- Fresh Raspberries: Use ripe, firm berries for the best natural sweetness and vivid color.
- Granulated Sugar: Balances the tartness of the raspberries and helps with the jam’s thickening.
- Lemon Juice: Adds brightness and helps the jam gel by activating the natural pectin.
- Pectin (optional): Helps achieve that classic jam texture faster, though traditional recipes can skip it for a more natural set.
- Water: A splash to help dissolve sugar and prevent burning during cooking.
Variations for Old-Fashioned Raspberry Jam
Feel free to make this recipe your own! It’s easy to adjust the flavors and ingredients to suit your taste or dietary needs without losing that classic homemade charm.
- Mixed Berry Twist: Add strawberries or blueberries for a more complex berry flavor profile.
- Less Sugar Option: Reduce sugar slightly or try natural sweeteners if you prefer a less sweet jam.
- Herbal Accents: Infuse with fresh rosemary or mint during cooking for a subtle herbaceous note.
- Low Pectin Method: Skip commercial pectin and boil longer to naturally thicken your jam.
- Spiced Version: Add cinnamon, vanilla, or even ginger for a warm, cozy twist.

How to Make Old-Fashioned Raspberry Jam
Step 1: Prepare Your Ingredients
Start by rinsing the raspberries gently under cold water to remove any dirt or debris. Drain well and crush the berries slightly using a potato masher or fork to release their juices, but keep some chunks for texture.
Step 2: Combine Ingredients in a Pot
Place the crushed raspberries into a large, heavy-bottomed saucepan. Add sugar and lemon juice, stirring gently to combine all the ingredients well. If using pectin, you can mix it in at this stage as per the package instructions.
Step 3: Cook the Jam
Bring the mixture to a boil over medium-high heat while stirring frequently to prevent sticking or burning. Let it boil vigorously for 10 to 15 minutes or until the jam thickens noticeably. The bubbling will become slower and more substantial when it’s close to setting.
Step 4: Test the Jam Consistency
Put a small spoonful of jam on a chilled plate, let it cool for a minute, then push it with your finger. If it wrinkles and doesn’t flood back together, it’s ready. If not, keep boiling and testing every few minutes.
Step 5: Jar Your Jam
Sterilize your jars and lids by boiling them in water for 10 minutes. Carefully ladle the hot jam into the jars, leaving about 1/4 inch space at the top. Wipe rims clean, seal with lids, and process in boiling water for 10 minutes to ensure preservation.
Pro Tips for Making Old-Fashioned Raspberry Jam
- Choice of Berries: Always use fresh, firm raspberries for a cleaner, brighter jam.
- Gentle Stirring: Stir often but gently to maintain berry texture without breaking down too much pulp.
- Consistent Heat: Keep the jam at a steady boil to help pectin activate and thicken properly.
- Jar Sterilization: Don’t skip sterilizing jars; it’s crucial for safe long-term storage.
- Timing the Set: Use the plate test method for the most accurate jam consistency every time.
How to Serve Old-Fashioned Raspberry Jam
Garnishes
Add fresh whole raspberries or a light sprinkle of finely chopped mint on top of your jam spread to elevate both presentation and flavor.
Side Dishes
Perfectly complements warm buttered toast, scones, pancakes, and even mild cheeses like cream cheese or brie for a delightful snack or breakfast.
Creative Ways to Present
Try swirling it into vanilla yogurt or oatmeal bowls for a fruity burst, use as a filling for homemade jam bars, or drizzle on ice cream for a simple dessert upgrade.
Make Ahead and Storage
Storing Leftovers
Refrigerate opened jars immediately and use within three weeks to maintain freshness and safety.
Freezing
For longer storage, you can freeze jam in airtight containers for up to six months without losing flavor or texture.
Reheating
Warm the jam gently on the stove when needed, stirring often to restore a spreadable consistency if it’s set too firm from refrigeration or freezing.
FAQs
Can I use frozen raspberries for this recipe?
Yes, frozen raspberries work well but may yield a slightly thinner jam due to extra moisture. Thaw and drain them slightly before cooking for best results.
Do I really need lemon juice in old-fashioned raspberry jam?
Lemon juice is important as it helps the jam set by activating natural pectin and also balances the flavor with a fresh tanginess.
How long will homemade raspberry jam last?
Properly canned unopened jars can last up to a year in a cool, dark place; once opened, keep refrigerated and use within three weeks.
Can I reduce the sugar in this recipe?
Yes, but sugar helps preserve the jam and affect texture, so reducing too much may cause a softer set and shorter shelf life.
What’s the best way to test if the jam is set?
Use the plate test: chill a small plate, drop a spoonful of jam on it, cool for a minute, then push gently—if it wrinkles and stays separated, it’s ready.
Final Thoughts
Making Old-Fashioned Raspberry Jam is a rewarding and delicious way to celebrate homemade goodness and seasonal fruit. With its simple ingredients and traditional technique, you’ll quickly find that this jam not only tastes amazing but also brings warmth to your kitchen and smiles at the breakfast table. So grab those fresh raspberries and start cooking—you’re about to create something truly special today!
Related Posts
- Easy 3-Ingredient Peanut Butter Cookies Recipe
- Why Philly Fluff Cake Is Your New Favorite Dessert
- Irresistible Tahini Thumbprints Cookies With Dulce de Leche

Old-Fashioned Raspberry Jam
- Total Time: 30 minutes
- Yield: Approximately 4 half-pint jars
- Diet: Gluten Free
Description
Capture the bright, tangy sweetness of summer with this Old-Fashioned Raspberry Jam recipe. Using simple pantry ingredients and traditional methods, this homemade jam delivers a perfect balance of sweetness and tartness with a rich, spreadable texture and slight berry chunks. Ideal for spreading on toast, swirling into yogurt, or gifting, it preserves the nostalgic charm of classic jam-making.
Ingredients
Main Ingredients
- Fresh Raspberries – 4 cups (ripe and firm)
- Granulated Sugar – 3 cups
- Lemon Juice – 2 tablespoons (freshly squeezed)
- Pectin (optional) – 1 packet or as per package instructions
- Water – 1/4 cup
Instructions
- Prepare Your Ingredients: Rinse the raspberries gently under cold water to remove any dirt or debris. Drain well and crush the berries slightly using a potato masher or fork to release their juices while keeping some chunks for texture.
- Combine Ingredients in a Pot: Place the crushed raspberries into a large, heavy-bottomed saucepan. Add the granulated sugar and lemon juice, then stir gently to combine. If using pectin, mix it in now according to the package instructions.
- Cook the Jam: Bring the mixture to a boil over medium-high heat, stirring frequently to prevent sticking or burning. Boil vigorously for 10 to 15 minutes or until the jam thickens noticeably and the bubbling slows down, indicating it is close to setting.
- Test the Jam Consistency: Place a small spoonful of jam on a chilled plate and let it cool for one minute. Push it gently with your finger; if the surface wrinkles and the jam doesn’t flood back together, it is ready. If not, continue boiling and test every few minutes.
- Jar Your Jam: Sterilize your jars and lids by boiling them in water for 10 minutes. Carefully ladle the hot jam into the jars, leaving about 1/4 inch headspace at the top. Wipe rims clean, seal with lids, and process in boiling water for 10 minutes to ensure preservation.
Notes
- Use fresh, firm raspberries for the best flavor and texture.
- Stir gently to maintain berry chunks and avoid breaking down the pulp too much.
- Maintain a consistent, steady boil to activate pectin and thicken the jam.
- Always sterilize jars to ensure safe long-term storage.
- Use the plate test method to reliably check jam readiness.
- Prep Time: 15 minutes
- Cook Time: 15 minutes
- Category: Condiments
- Method: Stove Top Cooking
- Cuisine: American
Nutrition
- Serving Size: 1 tablespoon
- Calories: 50
- Sugar: 12g
- Sodium: 0mg
- Fat: 0g
- Saturated Fat: 0g
- Unsaturated Fat: 0g
- Trans Fat: 0g
- Carbohydrates: 13g
- Fiber: 1g
- Protein: 0g
- Cholesterol: 0mg
Keywords: raspberry jam, homemade jam, old-fashioned jam, fruit preserves, homemade preserves, raspberry recipes, gluten free jam


