How To Make White Chocolate Ghosts Easily
If you’re looking for a fun, easy, and irresistibly sweet treat for Halloween, white chocolate ghosts are an absolute must-try. These adorable, spooky confections combine smooth white chocolate and playful shapes to create a delightful snack that everyone will love. Whether you’re crafting party favors or just craving a quick Halloween dessert, learn how to make white chocolate ghosts quickly with easy steps perfect for Halloween treats. Simple, spooky, and delicious, these ghostly delights are sure to brighten up any fall celebration with their creamy texture and festive charm.
Why You’ll Love This Recipe
- Effortless preparation: Just a few simple ingredients and quick steps get you festive treats in no time.
- Kid-friendly fun: Great activity for kids to join the Halloween excitement safely.
- Customizable design: Easily personalize your ghosts with different eyes and expressions for added cuteness.
- Perfect for parties: These white chocolate ghosts make spooky snacks that impress without stress.
- Taste that delights: Creamy white chocolate combined with just a hint of sweetness makes these ghosts irresistible.
Ingredients You’ll Need
The beauty of this recipe lies in its simplicity. With just a few essential ingredients, each plays a crucial role in creating the perfect texture, sweetness, and spooky white color that define white chocolate ghosts. These basics allow for easy preparation and tasty results.
- White chocolate chips or bars: Chosen for their creamy texture and sweetness, they form the ghost’s body.
- Black decorating gel or mini chocolate chips: Used for eyes and mouth to give your ghosts character and a spooky vibe.
- Parchment paper: Essential for easy shaping and cleanup when molding your ghosts.
- A small spoon or piping bag: For precision when pouring and shaping the chocolate into ghost forms.
- Candy eyes (optional): Pre-made candy eyes add an effortless and adorable expression to your ghosts.
Variations for White Chocolate Ghosts
One of the things that make white chocolate ghosts so enjoyable is how adaptable the recipe is. Whether you want to tweak flavors, textures, or presentation, these yummy ghosts can be customized easily to suit your preferences or dietary needs.
- Dip in colored chocolate: Add a swirl of pastel colors with tinted candy melts for a unique twist on the classic white ghost.
- Use dark or milk chocolate: Swap the white chocolate for darker varieties for richer flavor or contrasting ghost designs.
- Make vegan versions: Use dairy-free white chocolate alternatives to ensure everyone can enjoy the treat.
- Add sprinkles or edible glitter: Give your ghosts extra sparkle and texture for festive presentations.
- Flavor with extracts: A drop of vanilla or peppermint extract gives an aromatic twist.

How to Make White Chocolate Ghosts
Step 1: Melt the White Chocolate
Start by gently melting your white chocolate chips or chopped bars using a double boiler or microwave. If using the microwave, heat in 20-second intervals, stirring well between, until completely smooth and glossy. Ensuring the chocolate is melted carefully prevents burning and keeps it silky for shaping.
Step 2: Prepare Your Workspace
Lay out a large sheet of parchment paper on a flat surface. This will be your canvas for creating the ghost shapes. Make sure everything is ready to go so the chocolate doesn’t harden before you finish shaping.
Step 3: Shape the Ghosts
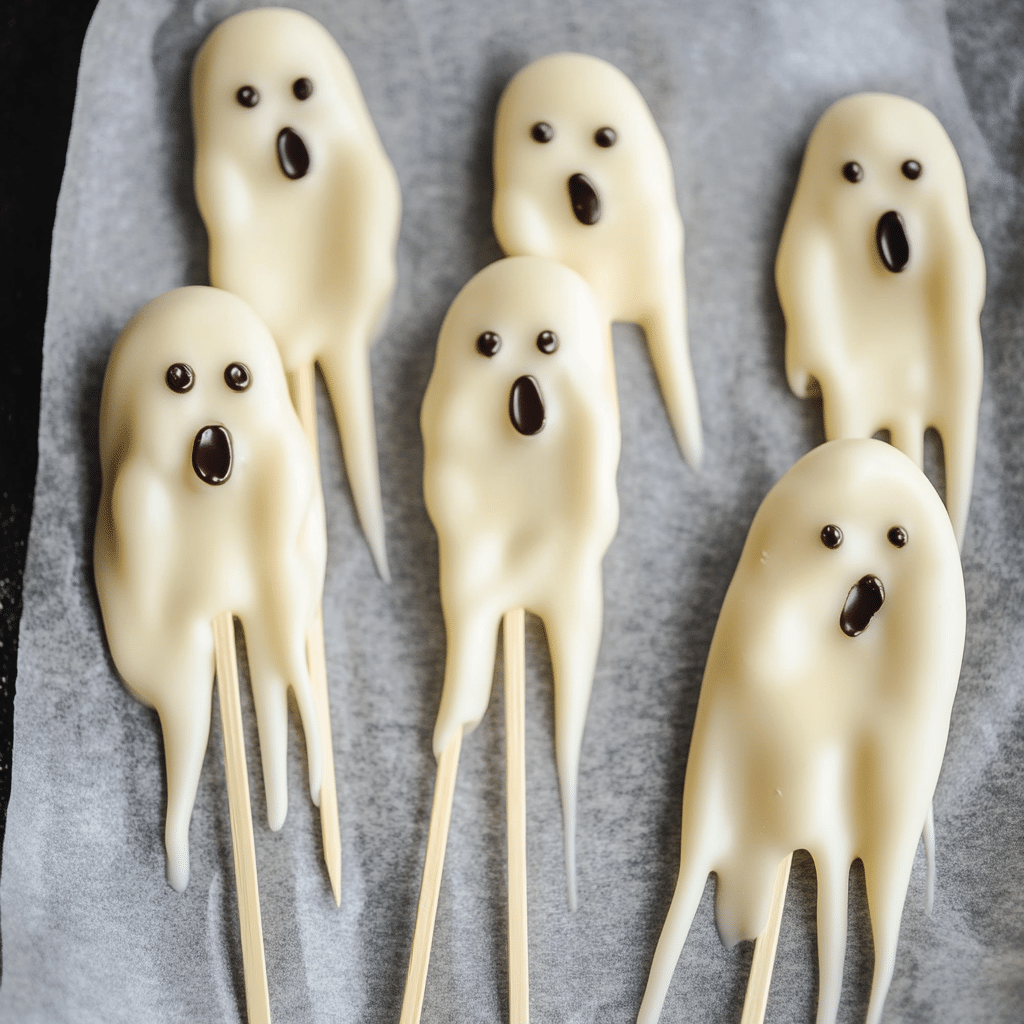
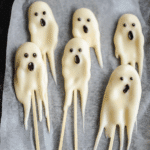
Using a small spoon or piping bag, carefully drop dollops or oval shapes of melted white chocolate onto the parchment paper. To form the classic ghost figure, you can create a teardrop shape with a slightly pointed top to mimic a ghost’s head. Allow some space between each ghost to avoid sticking.
Step 4: Add Eyes and Mouth
Before the chocolate hardens, use black decorating gel, mini chocolate chips, or candy eyes to add facial features. Place two eyes and a small open mouth for that perfect spooky yet cute expression. This step lets your ghosts come to life and makes them visually inviting.
Step 5: Let Them Set
Place the tray with your white chocolate ghosts in the refrigerator for about 15–20 minutes or until the chocolate sets completely and firms up. Once hardened, the ghosts will hold their shape well and be ready to enjoy or pack.
Pro Tips for Making White Chocolate Ghosts
- Use quality white chocolate: Premium white chocolate melts smoothly and tastes richer, improving the final outcome.
- Keep tools dry: Any water can cause white chocolate to seize, so ensure all utensils and bowls are completely dry.
- Work quickly but carefully: White chocolate can harden fast, so move efficiently but don’t rush the shaping process.
- Temperature matters: Melt chocolate slowly on low heat to prevent grainy texture or burning.
- Customize decorations: Try edible markers or colorful candy melts to add personality to your white chocolate ghosts.
How to Serve White Chocolate Ghosts
Garnishes
Sprinkle your white chocolate ghosts with crushed candy canes or edible gold dust to add festive flair and texture. Fresh mint leaves or tiny sprigs of rosemary can also create a contrasting green touch that looks lovely on a Halloween dessert tray.
Side Dishes
Pair these sweet ghosts with warm apple cider, pumpkin spice lattes, or even a rich hot chocolate for a cozy seasonal combo. They also complement baked goods like brownies and cupcakes beautifully, adding a sweet touch of Halloween whimsy.
Creative Ways to Present
Arrange your white chocolate ghosts atop a platter lined with black licorice or candy corn for a spooky centerpiece. Use clear treat bags tied with orange or black ribbons to gift them as cute party favors. Placing ghosts on cupcake toppers or cookie platters makes any dessert table instantly festive.
Make Ahead and Storage
Storing Leftovers
Store white chocolate ghosts in an airtight container at room temperature or in the fridge, especially if your home is warm. They can stay fresh for up to one week when kept cool and dry, making them perfect for prepping in advance.
Freezing
White chocolate ghosts freeze well if you want to make a big batch early. Place them on a parchment-lined tray until frozen solid, then transfer to a freezer bag to avoid sticking. Thaw in the fridge before serving to maintain their shape and texture.
Reheating
Typically, reheating is not necessary nor recommended for white chocolate ghosts, as they are best enjoyed firm. If your ghosts become slightly soft, let them sit at room temperature or chill briefly in the fridge to firm up again.
FAQs
Can I use regular chocolate instead of white chocolate?
Absolutely! You can use milk or dark chocolate for a different look and flavor, but keep in mind it will alter the classic ghostly white appearance.
What if my white chocolate seizes while melting?
If your chocolate becomes grainy or clumpy, it may have seized due to moisture or overheating. Try adding a small amount of neutral oil or gently reheat while stirring to smooth it out.
Can I make these ghosts without decorating gel?
Yes, mini chocolate chips or small drops of melted dark chocolate can be used for eyes and mouths if you don’t have decorating gel.
How long do white chocolate ghosts last?
Stored properly, they typically last about one week at room temperature or cooler, but keep them away from heat to prevent melting.
Are white chocolate ghosts safe for kids to make?
Definitely! With adult supervision for handling hot melted chocolate, children love participating in shaping and decorating the ghosts.
Final Thoughts
There’s something so charming about making white chocolate ghosts—a recipe that combines simplicity, creativity, and seasonal spirit in the best way. These treats are perfect for sharing the joy of Halloween with friends and family. Once you try making white chocolate ghosts, you’ll find it hard to resist their delicious charm, and you’ll want to bring them back every year for sweet, spooky celebrations!
Related Posts
- Irresistible Apple Coffee Cake with Cinnamon Streusel
- Easy Apple Crisp with Oats and Cinnamon Recipe
- Why Sour Cream Apple Pie with Brown Sugar Streusel Wins
White Chocolate Ghosts
- Total Time: 25–30 minutes including setting
- Yield: Approximately 15–20 ghosts 1x
- Diet: Gluten Free
Description
White chocolate ghosts are a fun, easy, and irresistibly sweet Halloween treat made from smooth white chocolate shaped into playful ghost forms. Perfect for parties, kid-friendly activities, and quick festive desserts, these creamy, spooky confections are customizable and sure to delight with their charming appearance and sweet flavor.
Ingredients
Ingredients
- 1 cup white chocolate chips or chopped white chocolate bars (about 6 ounces)
- Black decorating gel or mini chocolate chips for eyes and mouth
- Parchment paper
- A small spoon or piping bag for shaping
- Candy eyes (optional)
Instructions
- Step 1: Melt the White Chocolate – Gently melt your white chocolate chips or chopped bars using a double boiler or microwave. If microwaving, heat in 20-second intervals, stirring well between, until smooth and glossy, taking care not to burn the chocolate.
- Step 2: Prepare Your Workspace – Lay a large sheet of parchment paper on a flat surface. Make sure everything is ready before shaping so the chocolate remains melted and workable.
- Step 3: Shape the Ghosts – Using a small spoon or piping bag, drop dollops or oval shapes of melted chocolate onto the parchment paper. Form teardrop shapes with slightly pointed tops to mimic ghost heads. Leave space between each ghost to prevent sticking.
- Step 4: Add Eyes and Mouth – Before the chocolate sets, use black decorating gel, mini chocolate chips, or candy eyes to add faces. Place two eyes and a small open mouth to create cute and spooky expressions.
- Step 5: Let Them Set – Place the tray in the refrigerator for 15–20 minutes until the chocolate is fully set and firm. Once hardened, the ghosts will keep their shape and are ready to enjoy or package.
Notes
- Use premium quality white chocolate for smoother melting and richer taste.
- Ensure all utensils and bowls are completely dry to avoid chocolate seizing.
- Work efficiently as white chocolate hardens quickly, but don’t rush shaping.
- Melt chocolate slowly on low heat to prevent graininess or burning.
- Customize decorations with edible markers or colorful candy melts for added personality.
- Prep Time: 10 minutes
- Cook Time: 5 minutes (melting only)
- Category: Appetizers
- Method: No-Bake
Nutrition
- Serving Size: 1 ghost (approx. 15 g)
- Calories: 80
- Sugar: 8 g
- Sodium: 5 mg
- Fat: 5 g
- Saturated Fat: 3 g
- Unsaturated Fat: 1.5 g
- Trans Fat: 0 g
- Carbohydrates: 9 g
- Fiber: 0 g
- Protein: 1 g
- Cholesterol: 5 mg
Keywords: white chocolate ghosts, Halloween treats, kid-friendly desserts, easy Halloween candy, spooky snacks, white chocolate recipe